Over 15 Years of Experience
Residential and Commercial Services
Connect with Us
to Discuss Your Project
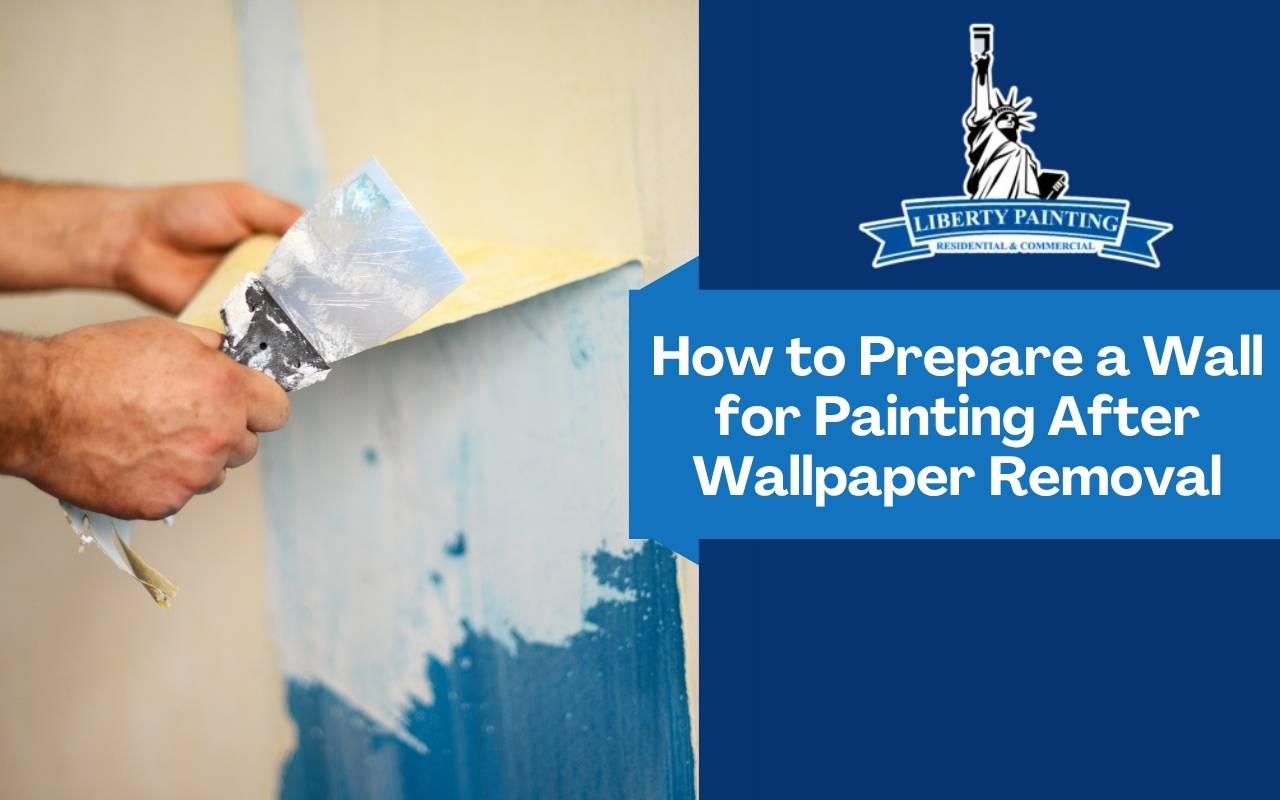
How to Prepare a Wall for Painting After Wallpaper Removal
Removing wallpaper can be a satisfying step toward refreshing a space, but what comes next matters just as much. If you’re wondering how to prepare a wall for painting after wallpaper removal, the key is in the cleanup, repair, and priming process. Skipping this stage leads to peeling, uneven finishes, or visible texture flaws.
At Liberty Painting, we often help homeowners fix surfaces after wallpaper comes down. Whether you're updating a dining room or transforming an outdated bedroom, your wall needs careful attention before it’s ready for a new coat of paint.
Why Proper Prep After Wallpaper Matters
When wallpaper is removed, it rarely leaves behind a perfectly smooth wall. You may find adhesive residue, gouges from scraping, or damaged drywall paper. If you paint directly over this, your results may look bumpy or blotchy, and the paint may not stick for long.
This is why how to prep a wall for paint isn’t the same after wallpaper as it is for a clean, painted surface. The wall needs to be cleaned, patched, and sealed to ensure the paint bonds evenly and lasts as long as it should.
Cleaning and Repairing the Wall Surface
Once the wallpaper is gone, start by removing any leftover glue. A mix of warm water and a bit of vinegar or mild dish soap works well for softening and wiping away adhesive. For tough areas, a wallpaper removal solution or gel can help break down the residue.
After the wall is clean, let it dry fully before checking for damage. Scrapes, dents, or lifted drywall paper should be repaired with joint compound. Apply in thin layers, let dry, and sand smooth. A second round of filling and sanding may be needed for larger damaged areas. Taking the time to smooth out the surface now will help prevent patchy paint later.
Priming Before You Paint
Priming is essential after wallpaper removal, even if the wall looks clean. A good quality primer seals in leftover residue and creates a uniform surface for your topcoat. It also prevents flashing—uneven shine that can show up when paint hits repaired areas.
Without primer, paint may soak unevenly into bare drywall or previously damaged spots. Professionals often use a high-build primer when prepping walls that were recently stripped of wallpaper, especially in older homes or bathrooms where moisture has affected the wall’s condition.
How Paint Prep Affects Long-Term Results
Learning how to prepare walls for painting pays off in fewer repainting needs later. Rooms with freshly prepped walls tend to hold their finish longer and look better over time. For example, kitchens and bathrooms—where wallpaper was often popular—usually require repainting every 3 to 4 years when prepped properly.
Skipping prep might mean repainting sooner due to peeling or visible flaws. If your goal is to refresh the look while reducing long-term maintenance, investing in quality prep work is a smart move.
FAQs – How to Prepare a Wall for Painting After Wallpaper Removal
Can I paint directly after removing wallpaper?
It’s not recommended. Residue and surface damage can interfere with paint adhesion. Clean, repair, and prime first.
What do I do if the drywall is damaged after removal?
Apply joint compound to patch any gouges or lifted drywall. Once dry, sand smooth and finish with a primer before painting.
Do I really need to prime the wall?
Yes. Primer evens out the surface, seals any leftover glue, and ensures your topcoat looks smooth and lasts longer.
Need Help Prepping Walls After Wallpaper?
Liberty Painting specializes in helping homeowners handle post-wallpaper painting the right way. If you're unsure how to prepare a wall for painting after wallpaper removal, our team can assess your surface and recommend the best steps for a smooth, long-lasting finish.
Contact us today for a free estimate and prep consultation. We’ll make sure your next paint job starts with a perfect surface.

Quick Links
Services
Contact
We are Licensed and Insured